Make it POPcorn Chicken!

30 Sep

   
Picky eaters annoy me and when it happens to be your 4 year old who refuses to eat a wonderful meal prepared by yours truly, then I’m damn well pissed off! (Aaaaand breathe) Every night, I stress about what to make for dinner and if “that kid” will even eat it. Now this guy LOVES popcorn chicken. He can eat it all day everyday from pretty much any spot that makes said dish.  So “light bulb” I decided to make my own version of it and he happily approves (thank God!)

I must say, popcorn chicken is very easy to make but at my house, I need to make more than humanly possible since thieves come by stealing the ones I’ve already made (jerks). Popcorn chicken pretty much goes with anything like rice, potatoes and did I mention rice? (Eh I’m Filipino) 

So without further or do, here’s my popcorn chicken that is totes kid approved…

What you will need: 


  Directions:

Cut and cube chicken breast

Heat oil in a pot or fryer.

Combine garlic salt, chicken bouillon, white pepper and cornstarch in a bowl and set aside.

In a separate bowl, scramble the eggs.

First dip chicken into egg batter (dip only a handful of chicken at a time).

Drop chicken into the cornstarch mix and thoroughly coat the chicken.

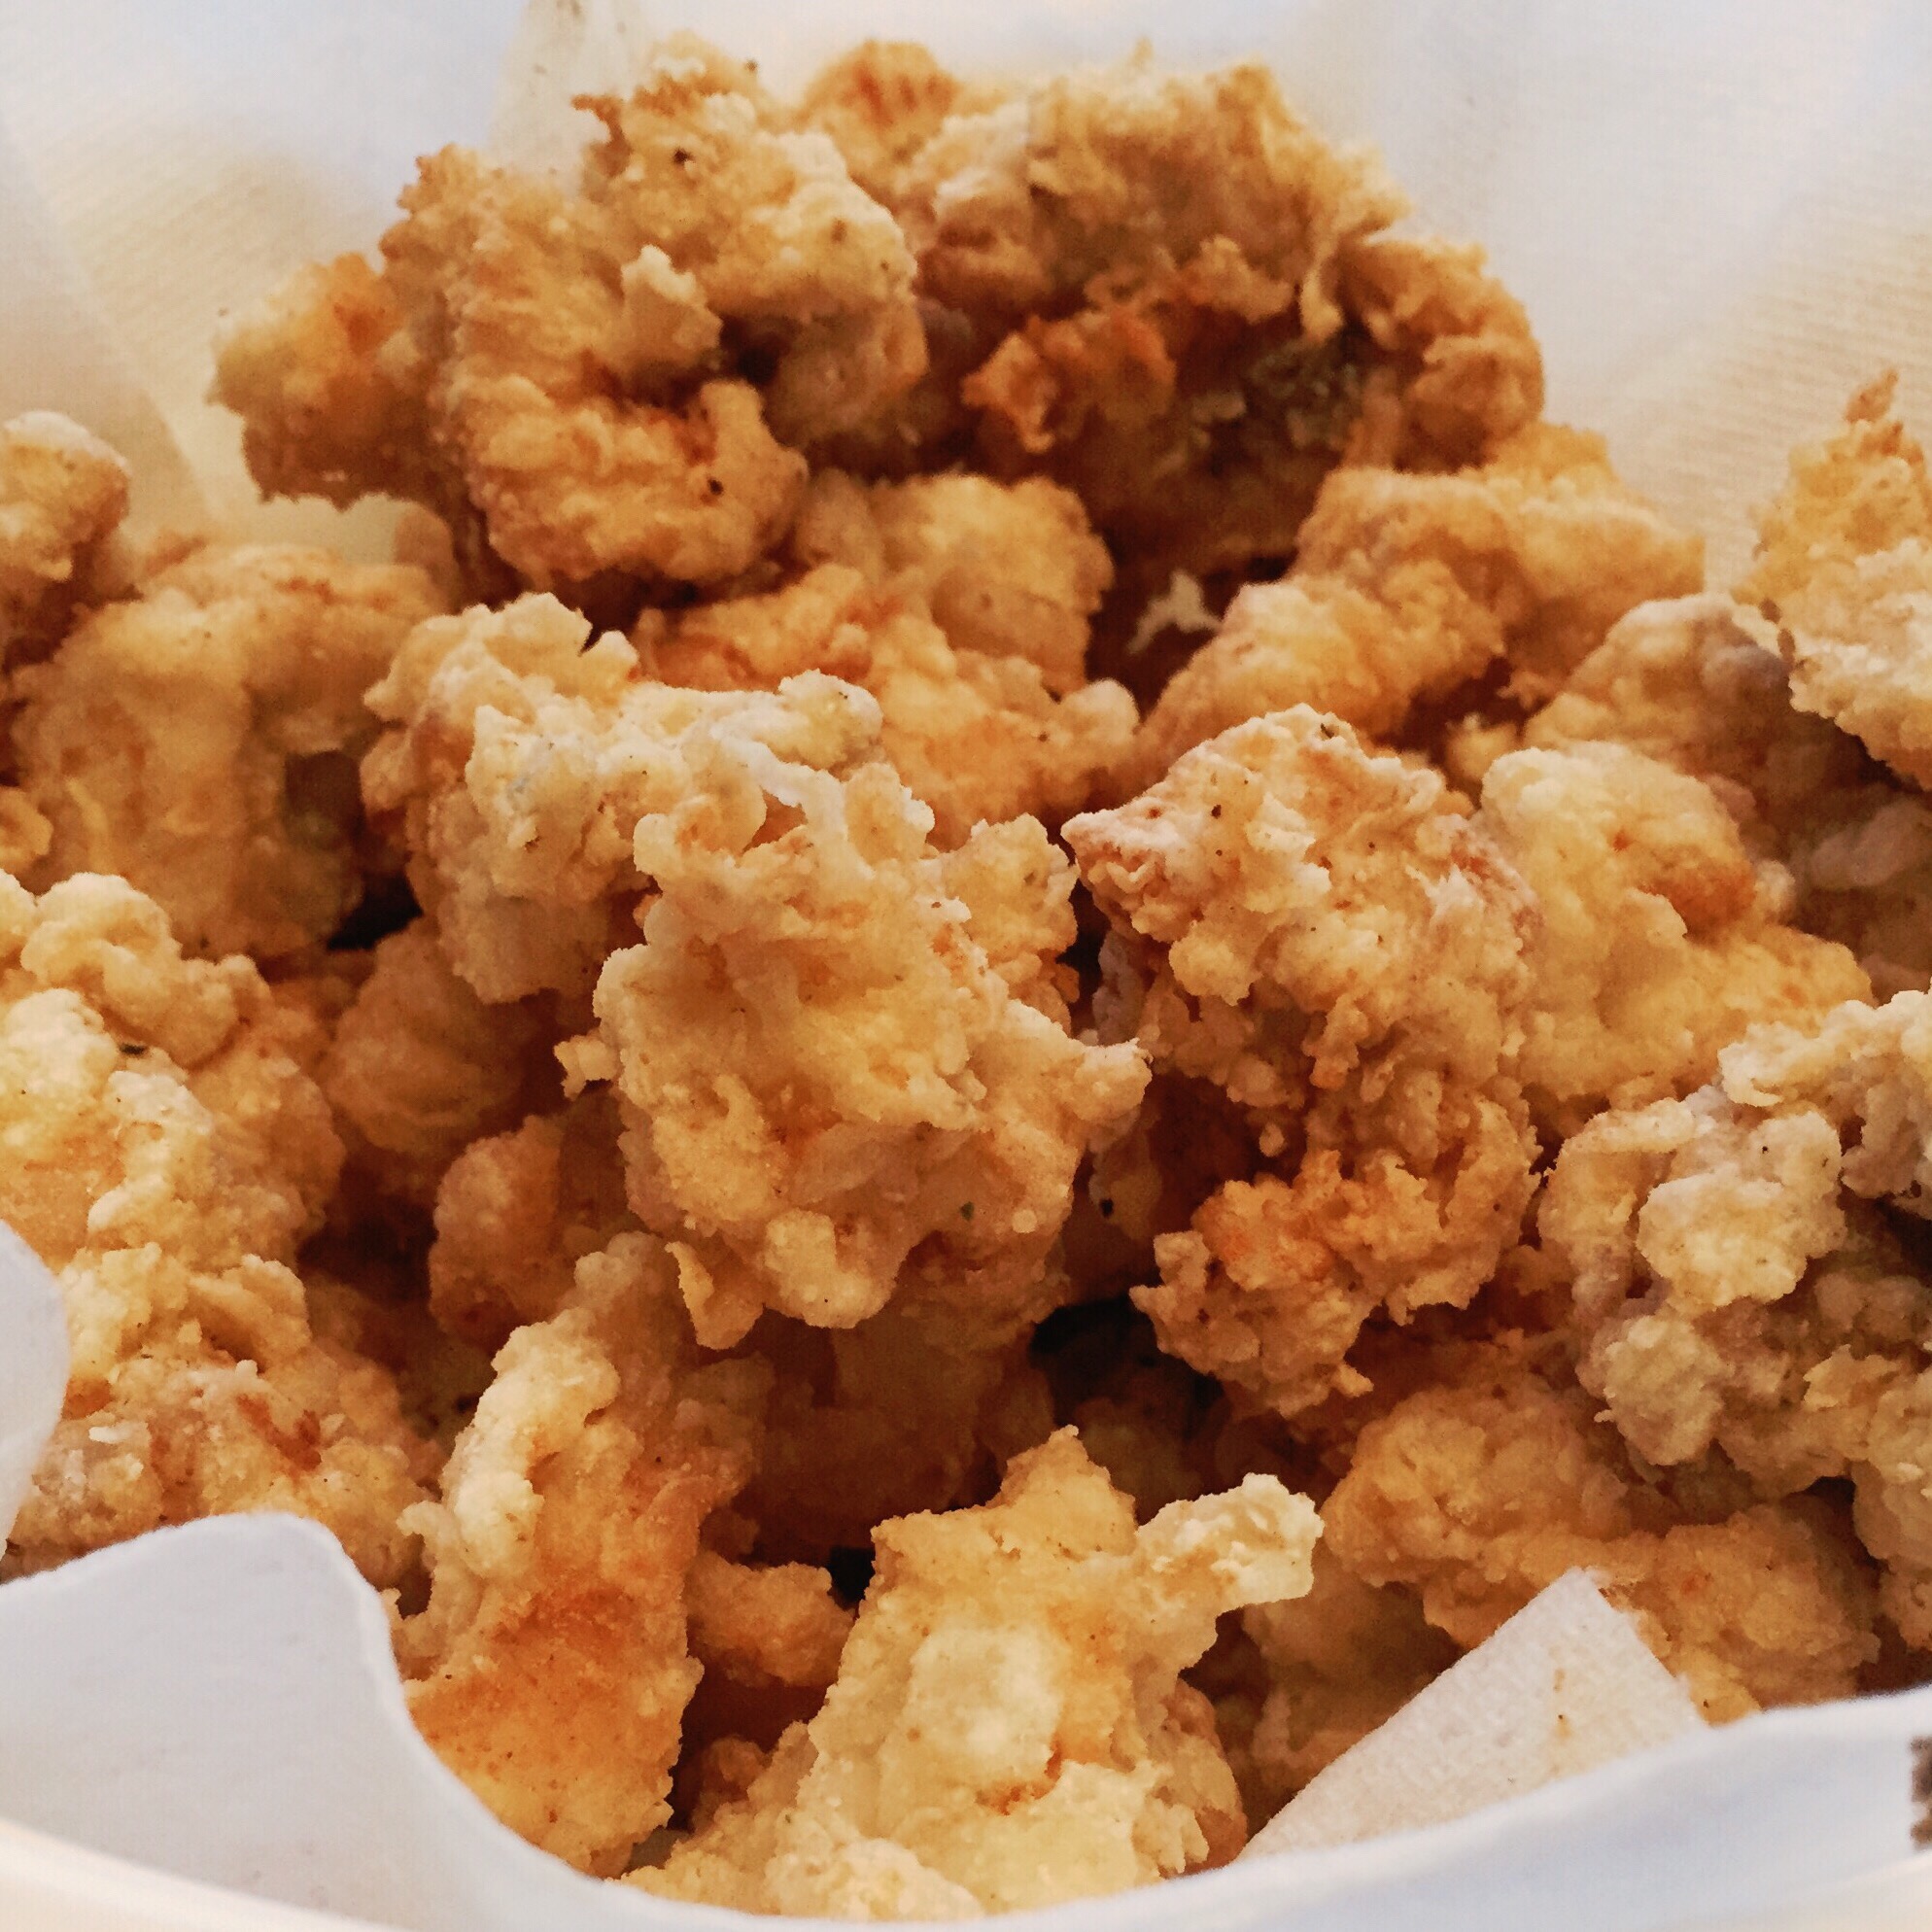
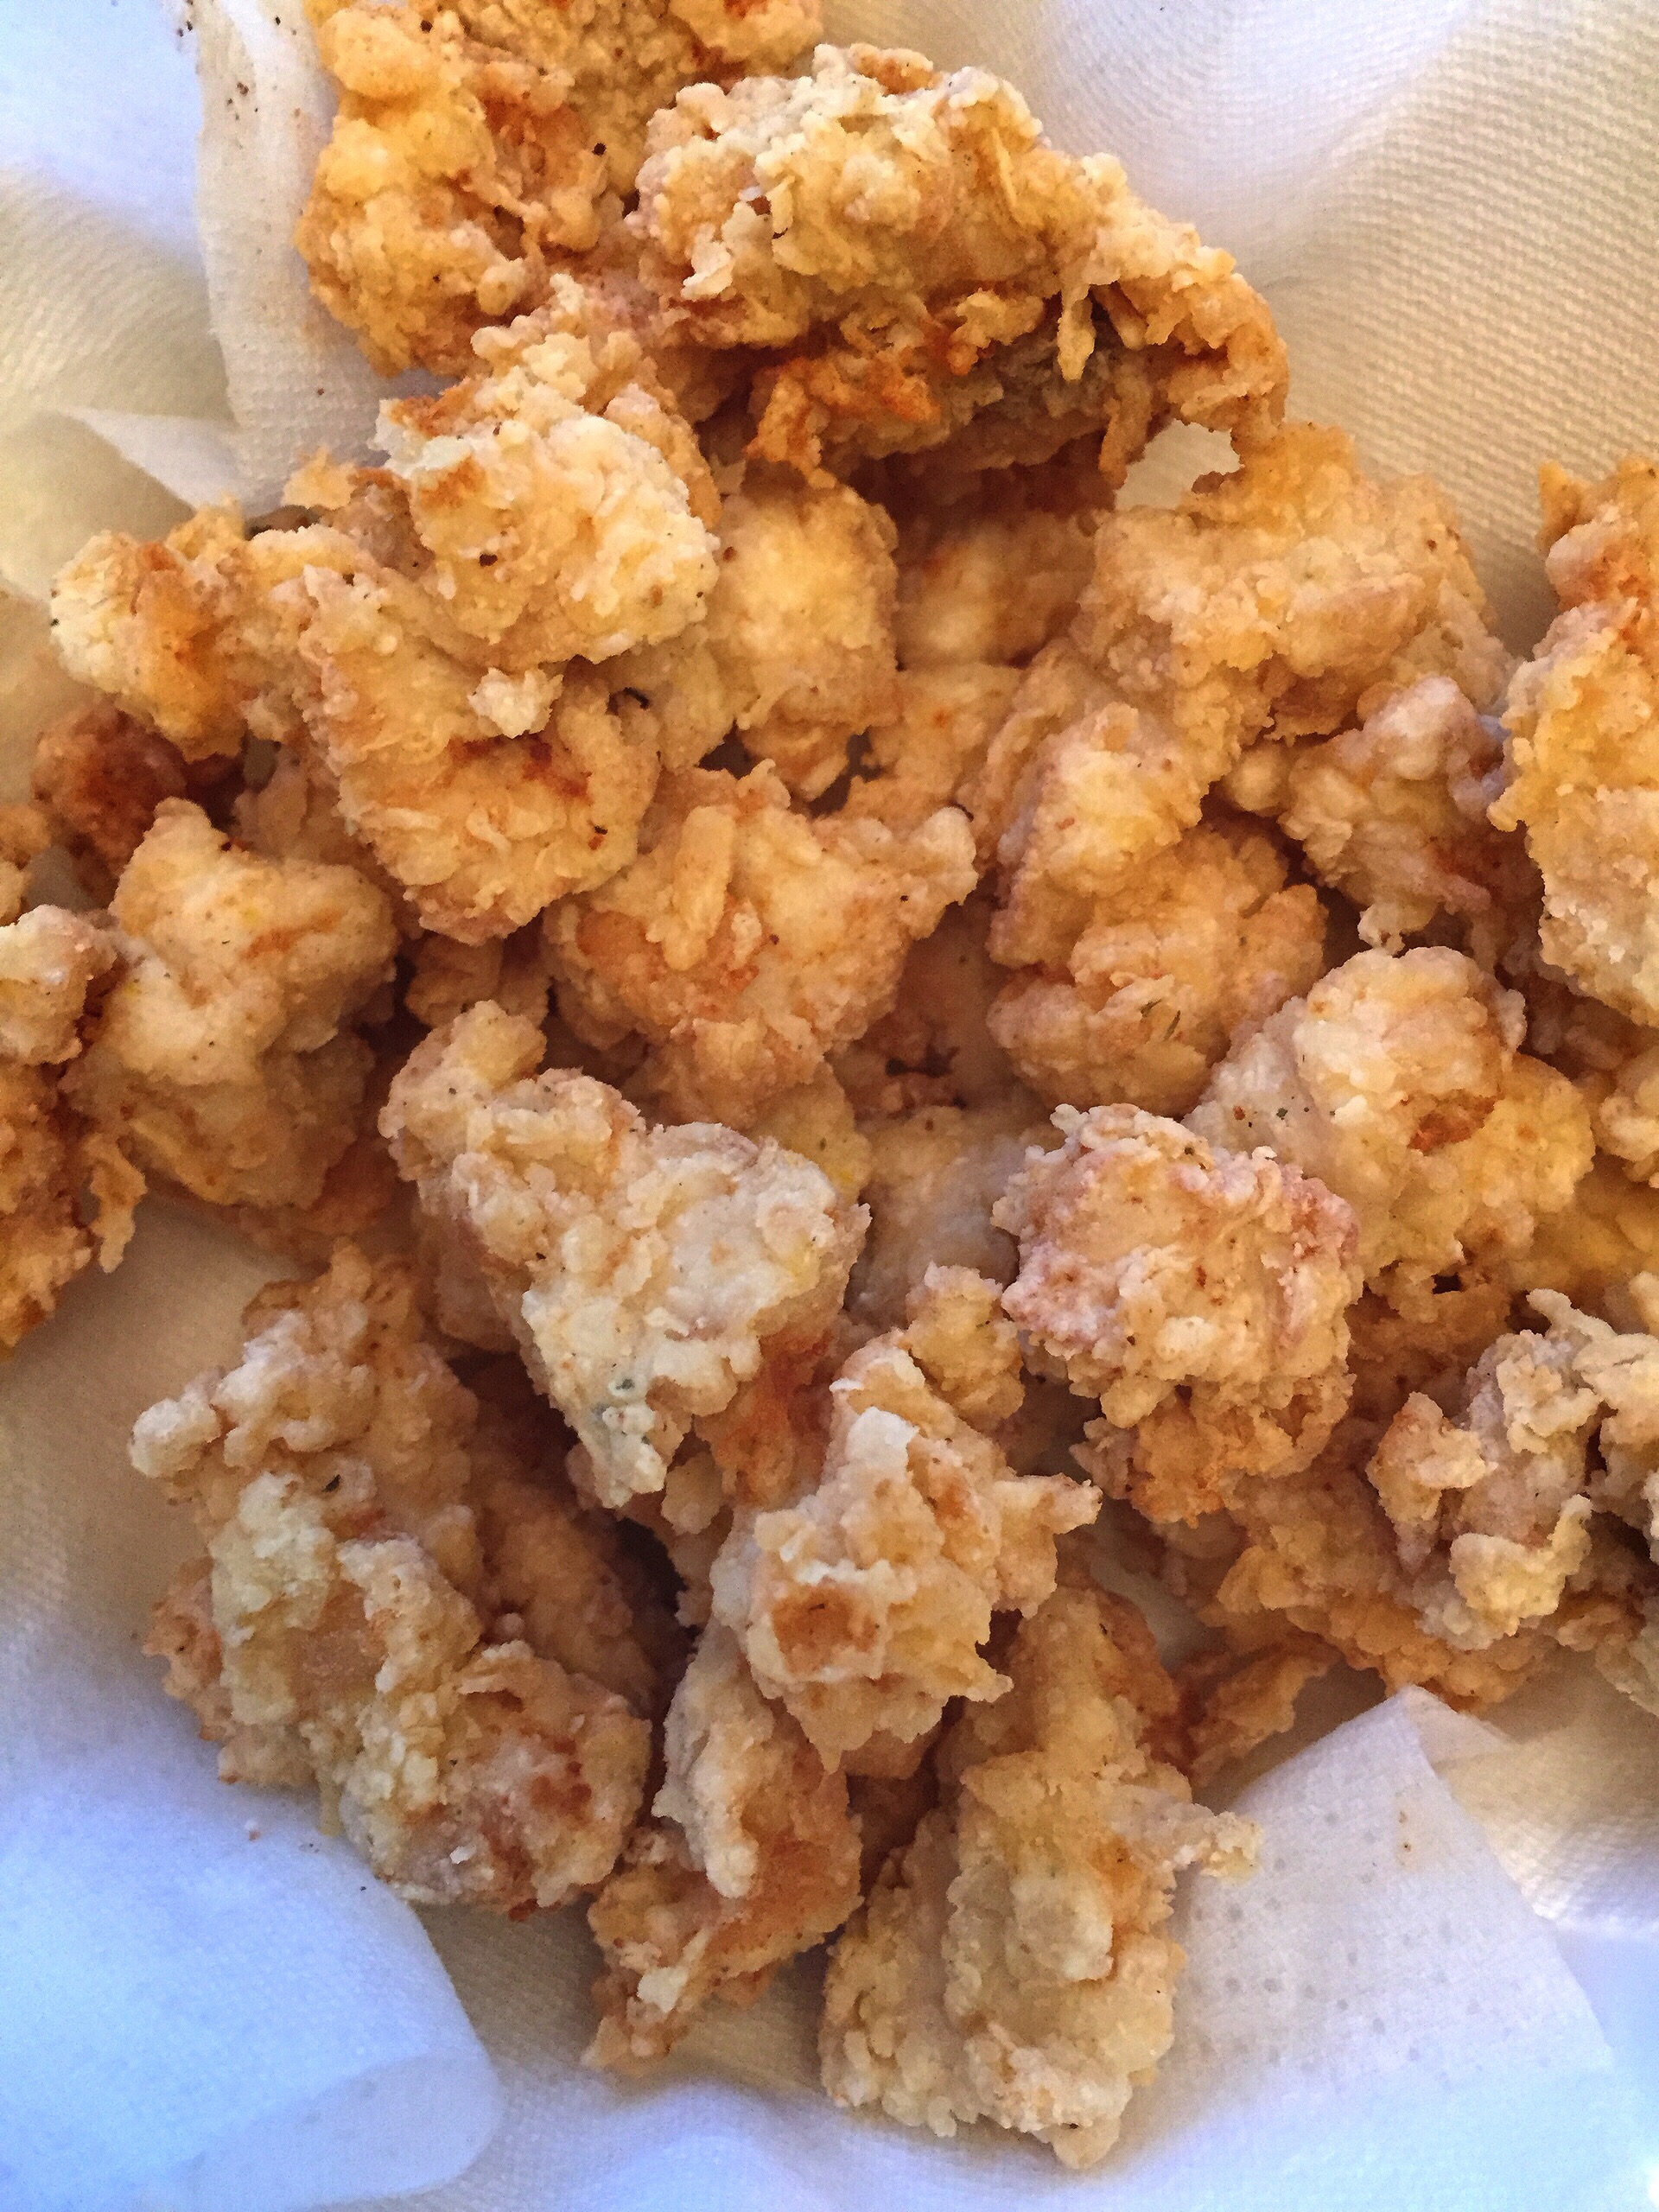
Fry only a  handful of chicken at a time until light golden brown and crispy (chicken should float to the surface when ready).

Place cooked chicken onto paper towels to absorb the oil.

 Call everyone to dinner and ENJOY! 

Please note: you can always make this dish to your liking whether it be the seasoning or meat (cuz pork is awesome too).


Living La Vida Loco Moco

22 Jul

loco moco awesomeness

Loco Moco is an artery clogging, cholesterol inducing plate of deliciousness!

Originated in Hawaii, the loco moco consists of rice, egg, hamburger patty and gravy. This dish in my opinion-whether you ask for it or not, is ideal comfort food at it’s best. I mean who doesn’t love food slathered in gravy? The ingredients of loco moco will always be found in my house and perhaps every Filipino household out there (I’m sure of it, I checked). There are numerous variations of loco moco, and as long as you cover it in gravy, I say “KUDOS to you my friend, kudos!”

So in time-honored tradition, I’d like to make MY version of loco moco that my fans love-my fans being my family, who don’t have a choice because it’s what I’m craving at the moment. *thumbs up* This is such a simple dish to make that my chef-in-training 9 year old did most of the work. I’m just taking all the credit because he doesn’t have a blog yet (I’m kidding).

IMG_9094

In my house, we prefer ground turkey and I’m too lazy busy to make gravy from scratch so I use good old brown gravy in a packet!

IMG_9089

before…

IMG_9090

…after

Some people prefer spam over patty which I would’ve used except we had spam the other night, so yeah. I like to cook the eggs sunny-side up so that the yolk can ooze out and mix with the gravy deliciousness.

IMG_9091

ta-da!


Ingredients for Loco Moco-serves 5

1 lb ground meat (any preference)

6 eggs

cooked rice

salt and pepper

1 packet of brown gravy

(yep that’s it)


Directions:

mix 1 egg into ground meat; add salt and pepper to taste; form meat into patties (size is up to you); cook patties until desired doneness, put aside; fry eggs to your preference (sunny side up is best), put aside; make gravy as directed on packet.

To make individual dishes, place cooked rice on your dish first; add a turkey patty or two on top of the rice; gently place a cooked egg above the patty; smother dish with brown gravy. Enjoy the hell out of it!

Don’t Call It A Comeback?

6 Jul

Hello friends! Hope some of you have missed me-if you haven’t, well then you know where to go! Let’s consider this entry an update/apology for not keeping up with my blog. I haven’t given up on CookingMamaLoraine, life just has me by the balls at the moment and any extracurricular activities like date night, girl’s night out and blogging has been put on the back burner. So, sorry…there I said it. I’m beginning to think that I’m lacking inspiration and motivation since I can’t even conjure up what to say at this moment. I have every intention of working on this blog and perhaps doing a little bit more. I can’t really decide, whatevs. So, yeah I’m alive and barely kicking but I can assure you that I’M BACK BITCHES!

…and I’m crafty too! PART DEUX

26 Dec

Oh hey there, it’s me again…the crafty mom who just has to go all out when it’s birthday time?? Yep, I’m back! So the baby just recently turned 1…I know, ALREADY?! Since I’ve already gone through this twice before, I reminded myself  to NOT overdo it and that the 1st birthday party is ALWAYS for the parents…like a 1 year old really cares about color scheme, theme and cake flavor, right? But every child deserves a kick-ass party whether or not he is old enough to comprehend what is going on!! So in time-honored tradition, I put on my thinking cap, poured myself a glass of wine (or 3) and began brainstorming for another birthday party theme.

It took me a while to figure out Benjamin’s first birthday theme. I asked the older kids for their opinion but even with all of our heads put together, we still couldn’t figure it out. Finally, while giving Ben his usual snack of  Nilla wafers…I realized, “this boy goes NUTS for cookies!” And who gets this crazy for cookies?…None other than Cookie Monster himself!

So since we’re sticking to a Cookie Monster theme, what better treats to serve at the dessert bar but cookies? I made my chocolate chip cookies ~courtesy of  Nestle Tollhouse  (now say it the way Phoebe from Friends says it, hehe).  I also made my Chinese almond cookies, which turns out, my almost diabetic father-in-law can’t get enough of…oops. And I cannot forget Ben’s favorites, which are Nilla wafers and Oreos!! The iced sugar cookies were added to the table to give it that splash of blue~courtesy of  Vons. I also wanted to add some extra oomph to the decor so I learned how to make pom poms~courtesy of Martha Stewart (curse her crafty awesomeness).

I would like to give props where props are due…the most fabulous birthday cake was made by my longtime friend/sister from another mister, Mary B. For all things delectable and for any and all occasions, you may contact her at: marybacosa@gmail.com, a sincere thanks!

My birthday boo was up to his armpits in love and gifts and I of course got “mad props” for my dessert table…until another birthday…I’m spent!

A Tribute To A Classic…Twinkie Cupcakes

14 Oct

I haven’t blogged in a while and I blame a new school year for the kids, a clingy baby and a new addiction to Pinterest! Don’t know what Pinterest is? Look it up, you’ll get just as addicted as I’ve become…you’re welcome!! In whatever free time I stumble upon (which is rare), I’m either in the kitchen or on the computer…so-here-goes…

TWINKIE: a tasty cream-filled pastry made from god-knows-what; known to have a shelf life of forever; if there was a nuclear war the only things to survive would be twinkies and cockroaches…thank you, Urban Dictionary!!

The hubby hasn’t had a Twinkie in years…YEARS, I say, due to the fact that he consumed a great amount of them while a young fobby child. He got tired of them and pretty much couldn’t stand the suckers.  I was aware of this and STILL married him, I know, right?! One day, he asks me to MAKE Twinkies. Shocked as I was, I of course took it to another leveland so, the Twinkie cupcake was born!!

The cake part of the recipe was adapted from Tasty Kitchen. For the cream filling part, I literally conjured this up in my mind as I prepared them! I was going for a light and creamy filling but with a cream cheese taste. (forgive me)

Ingredients for the cake:

1 box yellow or butter cake mix

1 cup milk

½ cup melted butter

¼ cup sugar

1 teaspoon vanilla

⅛ teaspoon baking powder

3 eggs

Ingredients for the cream filling:

1 tub of Cool Whip

1 8oz package of softened cream cheese

1 cup powdered sugar (you can always add more if you want it to be sweeter)

Directions:

Heat oven to 350°. Line each cupcake pan with a paper liner. Combine all cupcake ingredients and mix on low speed until combined. Mix at medium speed for 2 minutes until smooth. Fill cupcake liners half full. Bake for 12-13 minutes or until golden. Remove from oven and cool on wire rack for 5 minutes. Remove cupcakes from pan and allow to cool completely.

Prepare the filling by adding the powdered sugar to the softened cream cheese. Once mixed well, fold the Cool Whip into the cream cheese mix. Fill a decorating bag with the filling. (You can use any size tip, I used the star shape) Insert tip into the center of the cooled cupcake and squeeze bag to fill the cupcake with 1-2 tablespoons of filling. The cupcake will expand just a bit. Remove the tip from the cupcake and top off by swirling some frosting on the top of each cupcake. Repeat until all cupcakes are filled and decorated.

My little ones and the hubby LOVED them and it’s safe to say that it won’t be too long before I make these again! Please enjoy and share with your loved ones!!

It’s Peanut Butter Cookie Time…Where ya at? Where ya at?

22 Aug

So we were craving some sweetness last night and after perusing the pantry, I noticed an overwhelming amount of peanut butter. Being the peanut butter lover that I am, it was a  surprise that a copious amount of such greatness would last this long in my pantry. I immediately decided that cookies would cure our sweet fix. But alas, not enough flour…what’s mama to do? Google a recipe for flour-less peanut butter cookies, of course!

I’ve made peanut butter cookies before, but never without the usual ingredients such as flour and brown sugar, etc. I was skeptical at first but figured, if it sucked, I wouldn’t have wasted much…except for that sweet-sweet peanut buttah!! The cookies came out great. They did crumble easily and were a little too sweet  (even for me) but my daughter LOVED them, and that’s all that matters to me! Enjoy!!

Easy Peanut Butter Cookie recipe adapted from Kraft Foods…

Ingredients:

1 cup peanut butter (chunky or smooth)

1 cup sugar

1 tsp. vanilla extract

1 egg

Directions:

Preheat the oven to 350 degrees.  Beat egg with mixer until foamy. Add remaining ingredients; mix well. Shape into 1-inch balls. Place 2 inches apart on a baking sheet. Flatten in a crisscross pattern with the tines of a fork. Bake for 10 min. or until lightly browned. Cool on baking sheets  for 1 min. Remove to wire racks; allow cookies to cool completely.

…and I’m crafty too!

4 Aug

*sigh!* My little man turned the BIG 5, and what better way to celebrate a Summer baby than by having a “Dinosaur Pool Party!” He changed his mind a lot about the theme. At first, it was Cars2, then it became Power Rangers, then he finally agreed to those prehistoric favorites. Now, I’m that mom who goes all out when it comes to celebrating their spawn’s day of birth. I’m the one who’s balling as we’re singing “Happy Birthday”, realizing that “my baby is growing up!” *wiping tear* I’m also the procrastinator who waits until the night before the party to get everything done. I decided to create my own decorations, assemble a most fabulous candy/sweets buffet and make the giveaways! Who has the time, you ask? Not me, but I’m gonna sure as hell try!!

Yep, I made that banner! It could have been nicer and a little bigger, but no one even noticed it…the banner, that is! The kids and I cut out the dino pictures, but when it came time to hang everything up, everyone went missing…

I got a few chuckles since the hubby noticed that my “sweets table” looked more like a memorial table…kinda morbid, I know…

By the end of the party, I was indeed pooped, but nonetheless pleased with the turn out. The birthday boy was extremely thankful and I as usual, vowed to NEVER do this again…until the next kids’ party, of course!

Product Review-Bella Cucina Cupcake Maker

29 Jul


Since we’re experiencing a hot summer, I haven’t been using the oven much, but I’m sure no one can blame me. What better way to fulfill your craving for some cupcake awesomeness (without the use of an oven) than by using a mini cupcake maker? Mini cupcakes are cute and in MY opinion: make you feel less guilty for eating one since it’s so small…unless you pop them in your mouth by the dozen (ahem, me). My daughter and I discussed purchasing a cupcake maker and if you know me, then you know I was easy to convince!


The Bella Cucina Cupcake Maker allows you to make 7 cupcakes at a time in just 10 minutes. It’s portable, compact and cleanup is easy. There’s an indicator light to let you know when it’s ready to use and recipes are included. When we first tried it out, it took a few batches for us to figure out what works best. I do want to mention that it get’s very hot, so when making them with your little ones, adult supervision is highly recommended. Paper liners are a must to make each cupcake easier to remove when ready. In addition to easy removal, I used a bamboo skewer to pop out the little suckers. Since they’re so small, frosting was quick and easy. I would recommend this product to anyone who loves sweets, hates the oven and want to include your kids in the fun. It also makes a great gift.  A lot of cupcakes were made our first time and I even lost track, but needless to say…craving fulfilled!

end results

Sensio Bella Cucina 13465 Cupcake Maker, $19.99 available at Target and Macy’s.

“This @#$% is bananas B-A-N-A-N-A-S”

4 Jul

Turon is a popular snack or dessert, where ripe plantains are sliced and then wrapped in lumpia wrapper (a thin rice paper) and deep-fried. Turon is then finished off with a brown sugar glaze.

Turon

I freakin’ love turon and ALWAYS look for it at family parties unless I bring them myself.  I love the sweetness of that sugar glaze along with the savoriness of the banana. And I don’t really mind the little crumbs that fall into my cleavage after biting into one! When you have free time like myself, your mind wanders about the different variations of turon out there. In this version, I used wonton wrapper  instead of lumpia wrapper, since I was trying to go for a banana wonton-esque crispiness. After slicing the bananas, I coated them in sugar and brown sugar to make it extra-sweet. Lastly, instead of the brown sugar glaze, I topped it off with some powdered sugar. They came out great but needed to be eaten ASAP since wonton wrappers absorb a lot of oil and get soggy quick. They came out pretty small but cute things do come in small packages! Enjoy!!

ingredients

sliced plantains

finished turon

Ingredients:

1 ripe plantain

1 pack of wonton wrappers

1tbsp. sugar

1tbsp. brown sugar

cooking oil for frying

powdered sugar

Directions:

Slice plantains then coat them with sugar and brown sugar evenly. Since the wonton wrappers are small, you can only work with 1 slice at a time. Roll into  little eggrolls and fry in hot oil until golden brown. Sprinkle with powdered sugar and enjoy. Simple and sweet…

“How funky is your chicken?” Chicken Afritada

24 Jun

This is a hearty, tomato-based chicken stew. It’s definitely a favorite among the kids and hubby-so they say. It consists of chicken, fried potatoes and red bell peppers. Frying the potatoes really brings out the savoriness of the dish. This is what I grew up eating and (I know my mom is reading this: my version is NOT as good as hers), it is extremely easy to make. I will admit, I cheat and use the Mama Sita’s afritada mix, but remember: I’m a “working mom” and shelling out $1.09 for the packet is much easier for me.

fried potatoes

Please note, I’m also NOT a professional photographer and I DON’T have a fancy camera, therefore, these pics are the best I can do. And since we’re being honest, I think you should know that I’m typing this with one hand because I’m nursing the baby with the other!

boiling chicken thighs

red bell peppers

Good 'Ole Mama Sita and her mix!

Ingredients:

3 medium-sized russet potatoes

1 large red bell pepper

Chicken (I used 10 bone-in chicken thighs with skin-but you can use whatever you prefer)

1 packet of Mama Sita’s Menudo/Afritada stew mix

1 tbsp. cooking oil for frying

Directions:

Combine the Mama Sita mix with 1/2 a cup of water then set aside. Wash, peel and quarter potatoes then fry them in a skillet containing hot cooking oil. Brown potatoes on both sides and set aside for later. Cut red bell pepper into strips and set aside (feel free to save some of the red bell pepper seeds to make your dish spicy!) In a wok, brown the chicken on both sides, then add  water to make a nice boil. Add the Mama Sita mix to the chicken and let simmer while the chicken cooks through. Finally, add the fried potatoes and red bell pepper to the cooked chicken and you-are-done! Serve hot and of course, with white rice. Pretty easy huh? Enjoy!